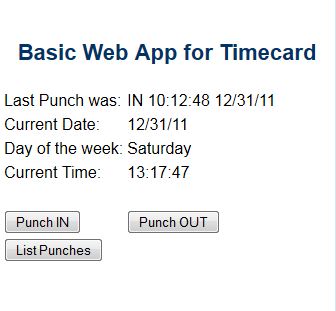
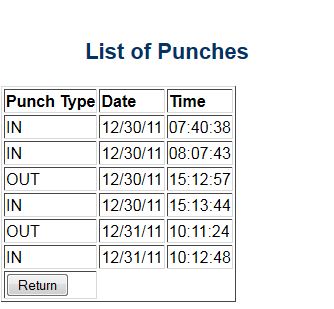
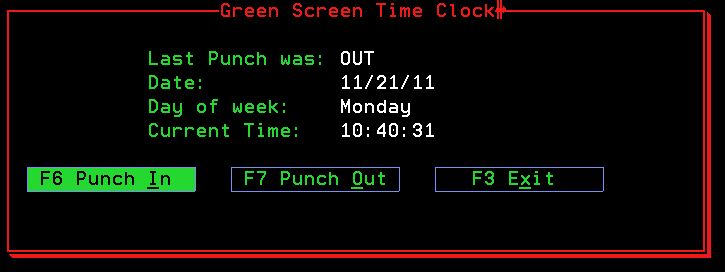
So we have this great little 5250 application which is now just an ugly web application. Truth is, this thing is so lightweight that as a web application, it is pretty snappy. But, not ALL applications are going to be this light weight and unless your standards are as low as mine when it comes to GUI, you’ll want to make this a *little* prettier. Here is where we are, so far: http://opensourceoni.com/mobilerem/cgi_punch.pgm
The great news is that with CSS3 and HTML5 the road from ugly to beautiful is short and sweet. We just need to add a bit of css and perhaps a javascript library to improve things. But there is some redesign needed as well, especially since we are now going to add some more heft to the size of the application. Our original design had two separate CGI programs which basically presented the two screens of information. In each case a page is constructed at the server end and sent back to the browser to be rendered. Not a great design since a large portion of the page really doesn’t change. And imagine if we had headers, footers and graphics on the page as well. All that back and forth can eat bandwidth and breaks our “good citizen” rule. So we need a new approach.
First, we are going to change from multiple pages to a single page. In jQuery mobile, the “trick” that is used is to define a div and treat it as if it were a page. With jQuery, jQuery mobile and the css added to the file, we can start to redesign the page like so:
<body>
<div data-role=”page” id=”main” data-theme=”b” >
<div>
<div data-role=”page” id=”punches” data-theme=”b” >
</div>
</body>
That creates two “pages” for jQuery mobile to work with. The library takes care of the heavy lifting of showing and hiding the pages as we “page” back and forth. Make sense?
For the “main” page, the first page we see that has the last punch and current time and date information as well as the buttons, there really isn’t all that much difference between the “classic” CGI page and our mobile page. We have a table with our information formatted into it. The “punches” page, where we list the information on the punches returned from the server, hasn’t changed all that much either except on both pages the /% %/ variable delimiters are gone because we are not making the round trip to the server so our CGI program no longer has to dump the information into the variables. So how, you ask, are we going to get data into the HTML forms? Ah! For that we use the magic of AJAX, JSON and the jQuery libraries.
AJAX
AJAX is the easiest part to understand. All AJAX does is send a small bit of data to the server (think of it as a miniscule web page) which the server reads and executes. That execution may return data, or it may not (usually does). The server packages up the data and sends it back to the AJAX requestor. At that point, the function that called the AJAX deals with the response.
JSON
The second piece, JSON, is a little harder to understand. Basically, JSON is just a string of data in a particular format. Basically the format is this: { “name”:value}. Deceptively simple but very powerful because if you know anything about JavaScript you know that looks very similar to an object definition in JavaScript. So, as an example, if we wanted to create an object called Person and add some attributes to it you would do it something like this:
personObj=new Object();
personObj.firstname=”John”;
personObj.lastname=”Doe”;
personObj.age=50;
personObj.eyecolor=”blue”;
But we could also do it like this:
personObj={firstname:”John”,lastname:”Doe”,age:50,eyecolor:”blue”};
And when we needed to get values from the object we would do it like so:
var first = personObj.firstname;
It shouldn’t take much of your brain’s CPU cycles to think: Hey, wait a minute! If I had a string formatted like so on the server: ‘{firstname:”John”,lastname:”Doe”,age:50,eyecolor:”blue”}’ and I returned that string to my web page with an AJAX call, I can create objects of data on the client without much effort! Pseudocode would be something like:
var personObj = getJsonFromAjax(); Nice! That is EXACTLY what we will do with a little help from jQuery.
jQuery
If we want to start hooking some of this stuff up, let’s begin by assuming that we have returned a JSON formatted string to our client application. jQuery pretty much handles all of the heavy lifting:
jsonURL = ‘cgi_mobile.pgm?action=getList’; // URL that calls our CGI program on the server
$.ajax({
url: jsonURL,
async: false,
cache: false,
success: function(data){
try
{
jsonContent = $.parseJSON(data);
}
catch(err)
{
alert(‘(JSON exception)’);
return false;
}
}
This code snippet would call the cgi_mobile.pgm and pass the action ‘getList’ and then the program would return that list in a JSON formatted string which is parsed back to an object using the $.parseJSON function in jQuery. You can take a look at the program source but basically the CGI program simply formats the data using a ‘json’ template and sends back the result which is a JSON string. It does it EXACTLY the way it would take an HTML template and send back HTML. You can take a look at the jsonlist.json template but there isn’t anything new except it formats the data as a JSON string.
That string is actually an array of JSON objects (because that is the way I formatted it!) so now I have an array of objects and those objects are “punches”. It looks like this:
[ { “lastPunch”: “IN”, “punchDate”: “12/30/11”, “punchTime”:”07:40:38″ } ,{ “lastPunch”: “IN”, “punchDate”: “12/30/11”, “punchTime”:”08:07:43″}] In fact, you can see the “raw” data just by calling that action in your browser:
http://opensourceoni.com/mobilerem/cgi_mobile.pgm?action=getList
Nothing special. AND since we now have an object we can iterate through and format our table on the client side with a little bit of javascript:
for(var i =0;i<jsonContent.length;i++)
{
var rec = jsonContent[i];
html = html + ‘<tr><td><input type=text name=lastPunch id=lastPunch value=’+rec.lastPunch+’ readonly></td>’
html = html + ‘<td><input type=text name=punchDate id=punchDate value=’+rec.punchDate+’ readonly></td>’
html = html + ‘<td><input type=text name=punchTime id=punchTime id=punchTime value=’+rec.punchTime+’ readonly></td></tr>’
}
Once we have that HTML constructed, jQuery just let’s us stuff the html into the empty body of the table in our “punches” “page”:
$(“#punchList tbody”).html(html);
And then we change the “page” (basically hiding the div we are on and showing the div named “punches”)
$.mobile.changePage(“#punches”,’slide’,false,true);
Not a whole lot of magic here. Just taking advantage of the capabilities of AJAX, JSON, and jQuery.
Believe it or not, the hard part is done. We can easily take this mobile web application and turn it into a mobile “native” application using PhoneGap. But, that will have to wait until next week (or so). Remember that you can get this code right here.
OH! I missed giving you a link to the actual web application. You will find that here: http://opensourceoni.com/mobilerem/cgi_mobile.pgm
Have fun!


